
Environments
Within Internal, you can create multiple environments in which to build and deploy your tools. Each environment is separate, allowing you to update and deploy tools in one environment without impacting the tools in another environment. This is often used to create a separate “development”, “testing” or “staging” environment from a “production” environment; so that users can use the final versions of tools in production while updates or development continues in another environment.
Creating a new environment
Access the Data & Functions tab within Company Settings.
Click the “Manage Environments” button.
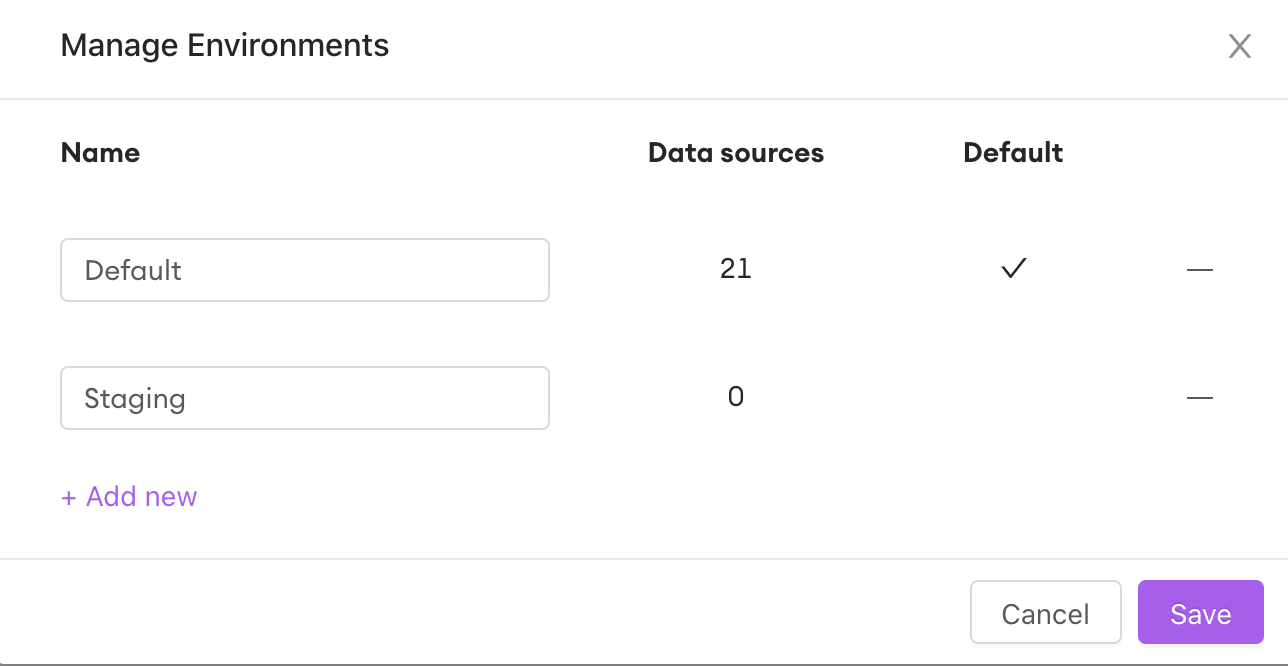
Initially, you’ll find a single default environment, which is named “Default”. Any credentials you’ve already added are in the default environment. When Internal connects to your data sources and auto-generates functions for use (and during future syncs), it uses the default environment, and does not use any other environment.
Tip: It’s best practice to make your default environment the production environment.
Your production environment is the environment in which users use the final versions of your developed tools. This will help ensure that the production environment has access to all of the data and functions Internal expects.
You can choose to rename your default environment, or click “+Add New” / “-” to add or remove a new environment.
Note: You cannot delete your default environment or any other environment which have configured datasources. Note that deleting an environment is different than deleting a data source.
Once you’ve created a new environment and click “Save”, you’ll want to add data source credentials for that environment.
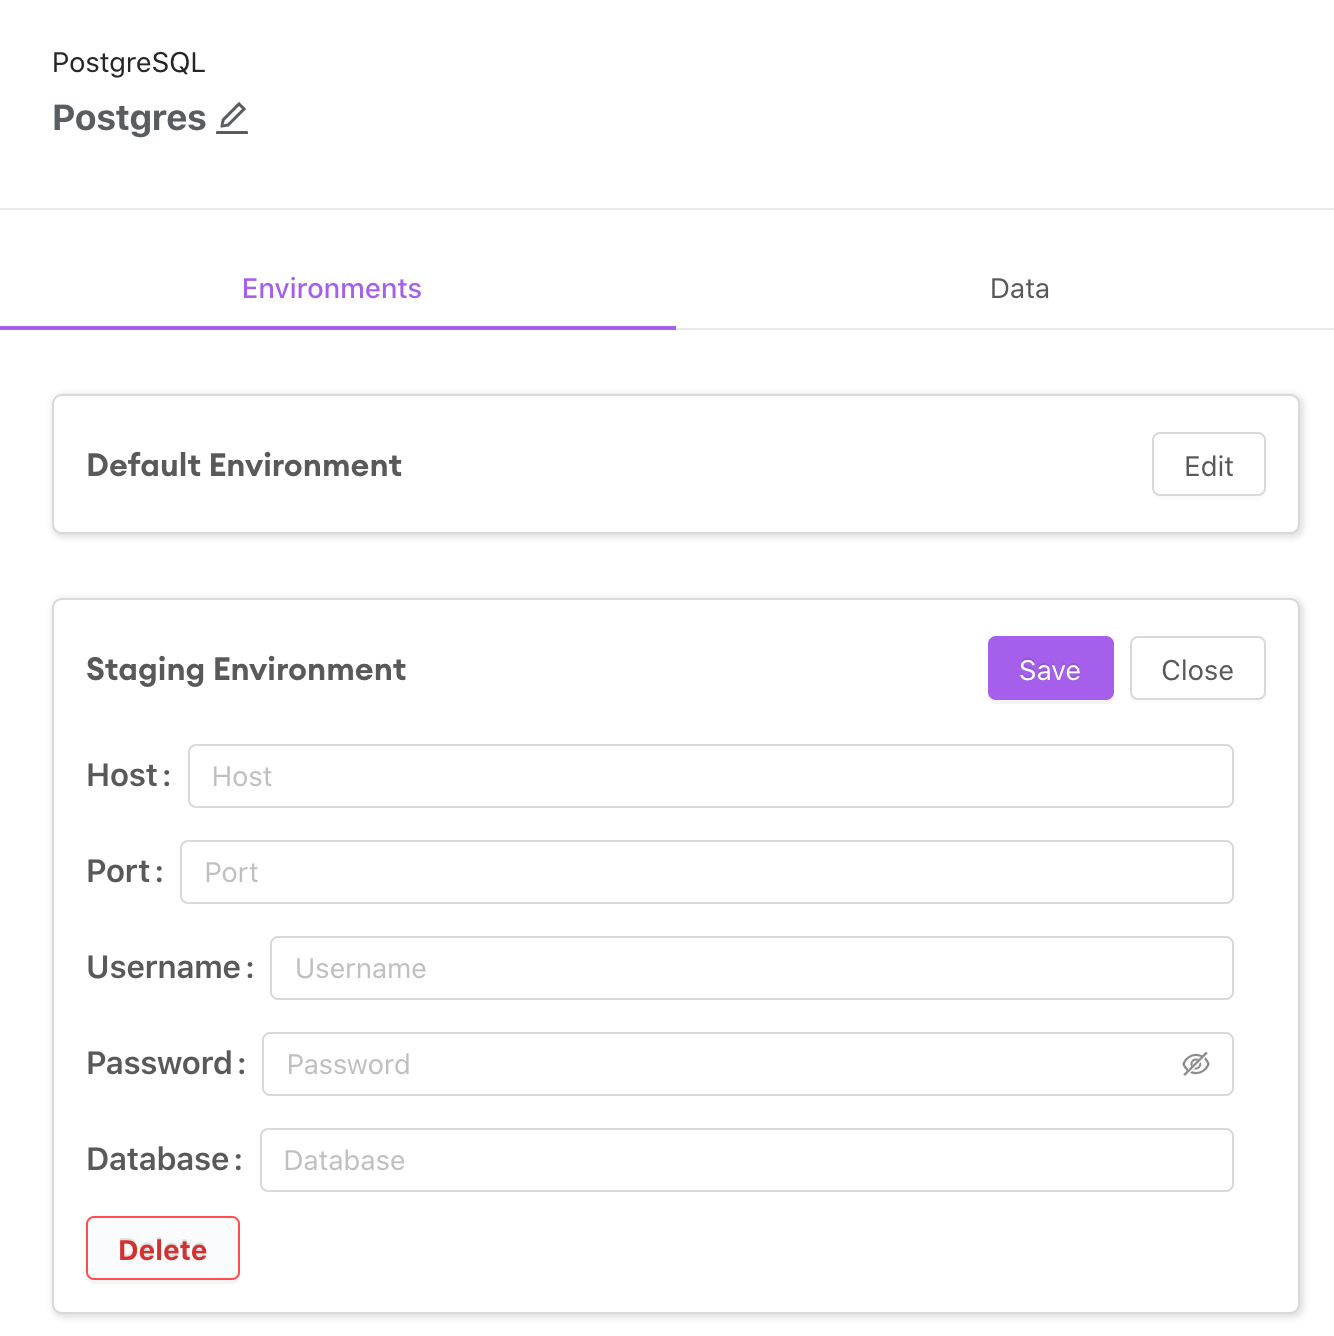
Adding data source credentials for an environment
Go to the Data & Functions tab and click on a data source. In the environments tab, you can add a new set of credentials for your environment.
Example: You want to set up a staging environment in addition to your default production environment. You have two separate MySQL databases for these environments, one called “sample” with dummy data for testing and development, and one called “prod” with your actual business data. Within the “Environments” tab of your MySQL data source, you would enter in the credentials for the “prod” database within your production environment (default) and the credentials for the “sample” database within your staging environment.
Take extra caution if you change the default environment’s credentials.
Since the credentials of your default environment determine the functions that are available in Internal, if your new credentials don’t provide the same level of access (or if some tables/fields are missing), some Spaces may break.
Example
Let’s say you initially only used a single (default) environment, and used the credentials for your database with sample data. You’ve created a few tools in this environment, and now you want to create a production environment so that these tools can be used with the actual production data.
You can create a new development environment, and swap in the credentials for the old default environment (that pointed to the sample database). You then update the default environment’s credentials to point to the database with production data.
If the new credentials (for production data), have more limited permissions than the credentials used to develop the tools, you may run into issues. For example, the new credentials may not have access to certain functions that the initial set did, which may break tools utilizing these functions. Or the new credentials do not have access to certain data fields, which may also break any tools that interact with those data fields.
Tip: As best practice, we recommend that you first test your new credentials by adding it as another environment. Once you confirm that your existing tools work with the new credentials, you can replace the default environment’s credentials.
Publish to environments
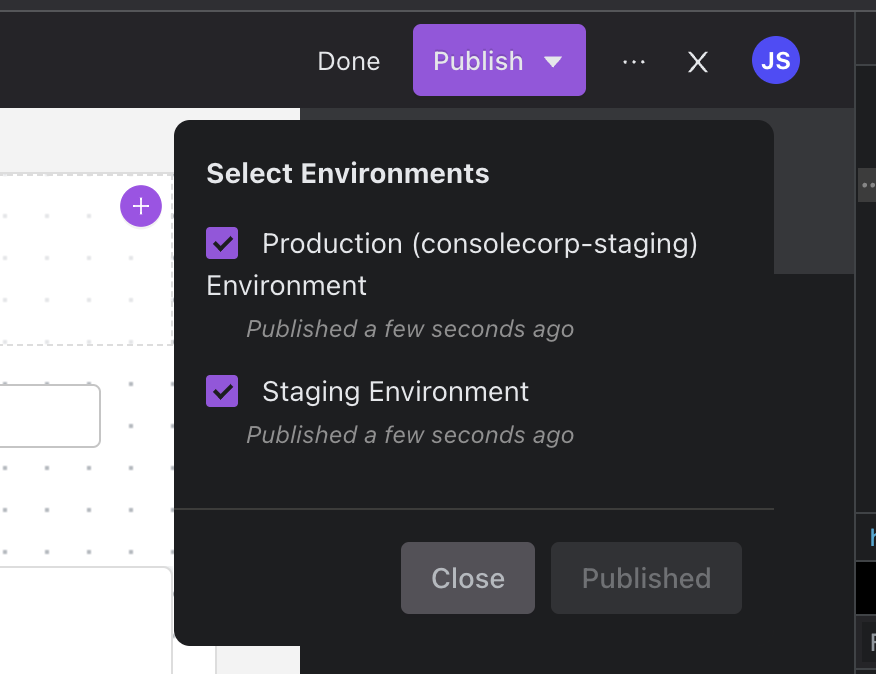
Once your environments and associated data sources are set up, you’ll be able to publish to different environments. You’ll need to publish your existing Spaces to your new environment to use them there. Users with permission to edit a Space also have permission to view and publish to the environments available.
Click “Publish” and use the publishing options to select the environment to which you'd like to publish.
Viewing tools across different environments
Anyone who has permission to edit the Space can also change the environment when using that Space. Click the dropdown (top-left) in the header to select your desired environment.
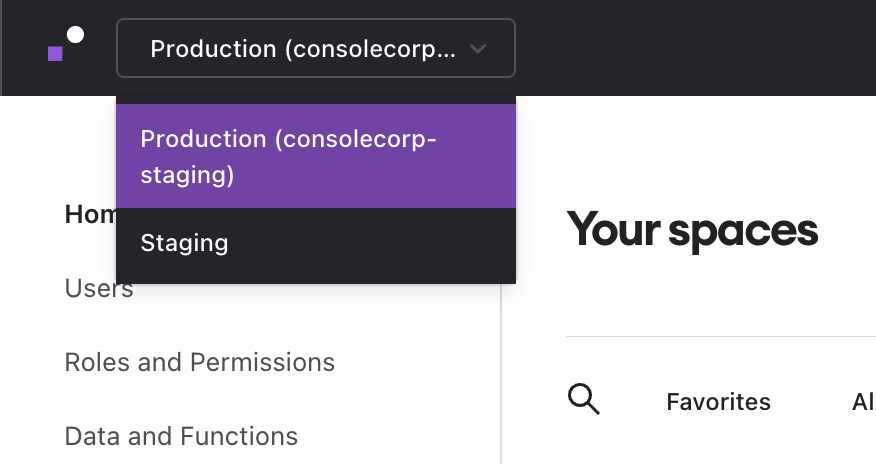
Note: Users that do not have permission to edit a Space can only see the Space in its default environment.
Updated about 1 year ago